
Create a Transaction Using 3DS
Only for credit cards
The PagSeguro International Payin API allows you to enhance credit card transaction security by using 3D Secure (3DS) authentication. This method adds a verification layer to confirm the identity of the cardholder, helping prevent fraud and reduce chargebacks.
External Authentication Required
This guide assumes you have already performed 3DS authentication with an external MPI (Merchant Plug-In) provider. The authentication data (CAVV, ECI, etc.) must be added to your payment request.
3DS authentication is currently supported only in the following countries:
- Brazil
- Mexico
- Chile
Supported card networks:
- Visa
- Mastercard
3DS Transaction Flow
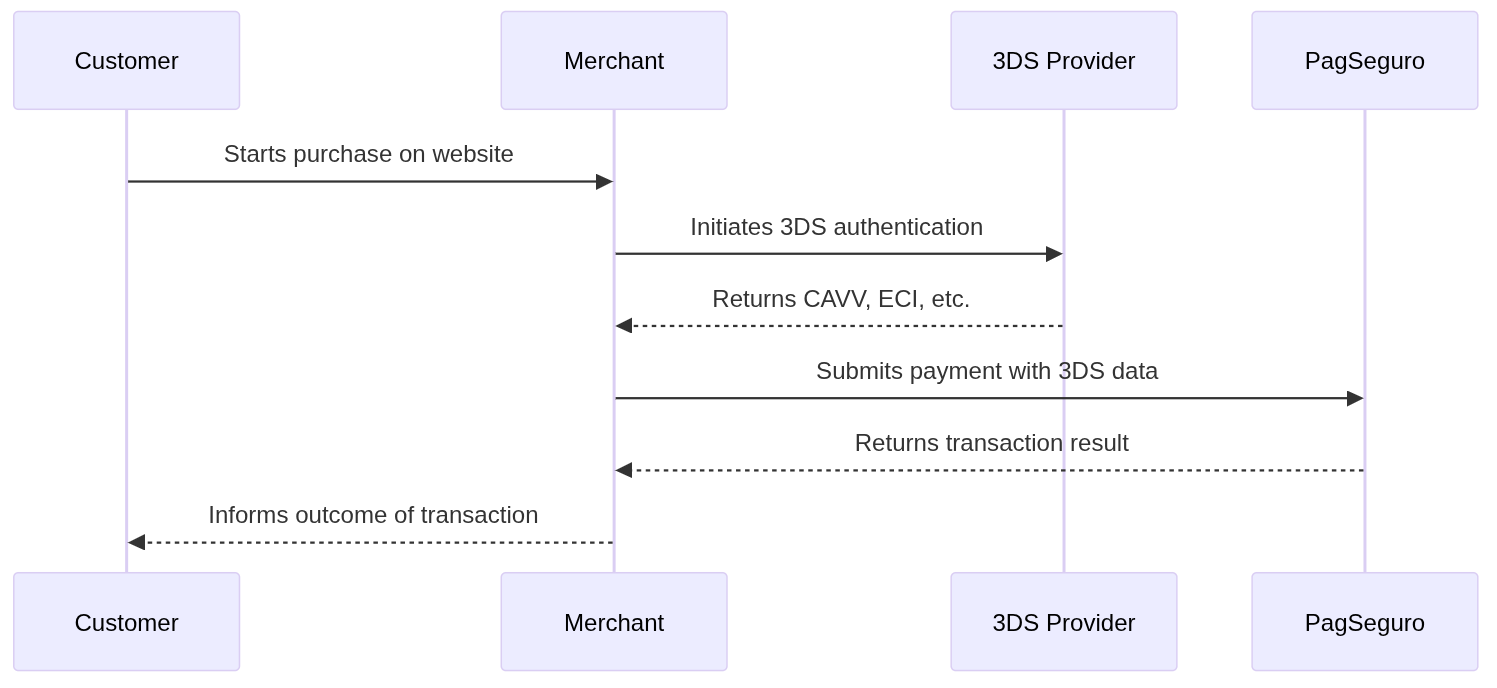
- Customer → Merchant: The customer begins the purchase on your website.
- Merchant → 3DS Provider: You initiate the 3DS authentication with your external MPI.
- 3DS Provider → Merchant: You receive authentication data (CAVV, ECI, etc.).
- Merchant → PagSeguro: You submit the payment request to PagSeguro, including the authentication data.
- PagSeguro → Merchant: PagSeguro processes the transaction and returns the result.
- Merchant → Customer: You inform the customer of the transaction outcome.
Step 1: Perform 3DS Authentication
Before submitting the payment to PagSeguro, authenticate the cardholder using a 3DS provider. This process will return the following parameters:
| Parameter | Description |
|---|---|
cavv | Cardholder Authentication Verification Value |
eci | E-Commerce Indicator – result of the 3DS authentication |
xid (optional) | Transaction identifier (required by some card networks) |
version | Version of the 3DS protocol used |
dstrans_id | Directory Server Transaction ID provided by the card network |
Important
When using external 3D Secure authentication, you are responsible for performing the 3DS flow outside our platform. To submit authenticated transactions, you must include a valid acquirer BIN in your request. To obtain your acquirer BIN, please contact your Technical Account Manager. Requests without a valid acquirer BIN may be rejected.
Step 2: Submit the Payment Request
Send a POST request to the Create a Transaction endpoint. Add the 3DS data to the authentication_method object inside the charge object.
Important
Ensure that the values submitted in
authentication_methodmatch exactly what was returned by your MPI. Inconsistent values will cause the transaction to be declined by the card issuer.
{
  "integration": {
    "reference": "REF-XXX-1234567890",
    "notification_url": "https://www.merchantwebsite.com/notify?type=transaction",
    "language": "pt_BR"
  },
  "order": {
    "currency": "BRL",
    "items": [
      {
        "quantity": 1,
        "description": "Product description",
        "unit_price": 101.10
      }
    ]
  },
  "charge": {
    "country": "BR",
    "type": "CREDIT_CARD",
    "credit_card": {
      "raw": {
        "number":"4073020000000002",
        "cvc":"123",
        "expiration_month":"12",
        "expiration_year":"2028"
      },
      "holder_name": "jonh doe"
    },
    "authentication_method": {
      "type": "3DS",
      "cavv": "BwABBylVaQAAAAFwllVpAAAAAAA=",
      "xid": "BwABBylVaQAAAAFwllVpAAAAAAA=",
      "eci": "05",
      "version": "2.1.0",
      "dstrans_id": "DIR_SERVER_TID"
    }
  },
  "payer": {
    "email": "[email protected]",
    "ip": "192.0.2.146",
    "person": {
      "name": "Mr. Payer Full Name",
      "birth_date": "1970-01-01",
      "document": {
        "type": "CPF",
        "number": "98765432101"
      },
      "phone": {
        "country_code": "55",
        "number": "44900000000"
      }
    }
  }
}
Reference Pages
For additional requirements and options, refer to the following:
Step 3: Process the API Response
If the transaction is successful, the API returns a response like the following:
{
  "code": "25a58ef1-3755-476b-b2f6-e445b170a849",
  "reference": "REF-XXX-1234567890",
  "status": "PENDING",
  "amount": 101.1,
  "currency": "BRL",
  "country": "BR",
  "created_at": "2021-04-12T12:43:13Z"
}
Step 4: Monitor the Transaction Status
You can track the status of the transaction via:
- the
notification_urlcallback - or by polling the Get Transaction by Code endpoint
For guidance on interpreting transaction status values, visit the Transaction Status Description page.
Updated about 1 month ago